6.09.2014

stuff, things, and more stuff...

it just crossed my mind that i have a blog that has been woefully neglected in recent months, so here i am with a (somewhat) random glimpse at the (highly-unexciting) stuff going on around these parts.

apparently it has stopped snowing in Canada long enough for this to happen.


all of Nature rejoices!!!  i celebrated with a reintroduction to summer reading in the park.  this season's literature list will consist mainly of murder mysteries in the gentleman detective tradition.  i wish someone would resuscitate Agatha Christie just long enough for her to produce about 2 or 50 more Poirot novels, because they really are my favorites.  still, a quick trip to the local used-books store yielded a decent stack of paperbacks, including a couple new authors to audition.


now, not being Canadian, i had to take some extra precautions before officially launching into park-reading season. specifically (as i could hear my great-grandmother's voice in my head predicting some incurable disease if one dared even stand too long on wet, cold ground), i opted to wait an extra week or two to make sure that everything had indeed thawed before claiming a spot under a sturdy tree at the very center of the park. this is the view looking up into the chosen tree [my favorite animator took the picture, but it's my camera, so i claim all rights to its use]...


and this is the view, from my special tree, of a big crabapple in bloom. the building in the background is a funeral home, complete with lots of creepy windows that are guaranteed to cause a chill when walking by late at night.  but, i digress.  crabapple blossoms and happiness...


i got about ten pages into my very first Ngaio Marsh mystery...


...when i realized that i was already hooked, which prompted a return to the used bookstore for more (which loosely translates to, i took everything i could find with her name on the cover).  i take my addictions very seriously!


so, there i was reading my book, basking in the liberal application of SAT words (the lady has had a way with the language that makes me smile), when i noticed movement in the distance, prompting me to abandon the unfolding murder and to go diving for the camera.


now, you have to understand that i've had a few rather unsettling (some may say, hilarious) encounters with squirrels back home in NYC, so i tend to enter a state of total-panic whenever one gets within 20 feet.  but this one was at a safe enough distance that i could let down my guard and try to grab a shot (or twenty) in the rapidly-waning light.  there i was, waiting for my subject to stop squirming long enough to capture something other that a total blur, when (s)he, as though sensing my presence from several trees away, turned rapidly and stared directly into the lens. [this is the actual picture, taken mid-rotation]...


i'm not going to lie... i let out an audible shriek, which was met with extreme amusement by my park-blanket-partner who'd observed enough of the exchange to know the cause of my sudden fright.  so, to recap... a squirrel from half a park away made me scream like a little girl because (s)he turned and looked my way.  yep, that happened.  however, in my defense, it looked much larger and closer through the lens and i expected to drop the camera and find a 10 foot tall squirrel standing right in front of me.  (s)he decided to add to my discomfort by continuing to stare directly at me until i conceded and packed up my stuff to go home.  so, yep... i basically lost a staring contest to a squirrel.  oh, the shame!


what made this extra-hilarious was the fact that just that very morning, i'd casted on to knit a squirrel-themed sweater for one of my favorite Aussies, who finds much humor in my sciurophobia. there will be no previews of said object until it is completed and has been duct-taped to the back of a dolphin heading in that general direction, so you'll just have to trust me that it is really happening. i may need therapy by the time it's done, but it really is happening!

...........................

on the domestic front, i've decided to forego the tomato experiment this year (as it yielded a total of about one dozen cherry tomatoes last year).  so, instead,  i've placed a large bucket of thai basil next to the window-box of rosemary and oregano, which should make for a few extra-tasty meals in the near future.  the basil is already in need of a bit of thinning out, so there may be a coconut-basil curry on the menu before the end of the week.


it dawned on me that my frequent headaches may be an indication that i needed new reading glasses, and it would appear that my summation was quite correct.  i told the technician at the optometrist's office that i wanted something substantial (i.e., LARGE), with just a hint of  vintage sexy-librarian vibe (i used those words exactly). now, i'm usually indifferent to glasses, as i only really need them when using the 'puter or reading for an extended period of time, but i wish i could see more than two feet in front of my face while wearing these frames, because i would seriously wear them every waking moment of the day.


oh, and last (and, possibly, least) of all.. someone had a birthday this weekend... and it was me!!!


fortunately, it started out as a really awesome, bright sunshiney day.  unfortunately, it ended with a quadruple-dose of antihistamines and a twelve-hour rest to sleep it off.  turns out that there was enough wheat in the crust of the coconut-pineapple cheesecake (which was as close as i could get to the coconut cake with pineapple filling i really wanted) to send my allergies into overdrive, and i had to take four doses of antihistamines before i stopped itching all over just long enough to fall into a deep, drug-induced sleep.  my awesome birthday dinner became an awesome day after the birthday late-lunch, and i learned (the hard way) to avoid the crust when enjoying cheesecake.  seriously... best birthday i've had in a long time!!!

4.01.2014

one degree of happiness...

happy thirteenth day of Spring!!!  sure, there is still lots of snow on the ground (some of it from the out-of-nowhere storm two days ago), but i am happy to announce that it is a bright, sunshiny day in Métropole Nord, and it is a whole degree above freezing.  one whole, stinking degree.  hooray!  almost makes me want to shove my winter coat into the back of the closet... but only for a moment, because it will slip back below freezing as soon as the first cloud slides in front of the sun.

i pulled open the curtains to let in some much-needed sunlight, and it seemed like a good opportunity to document my latest work-in-progress.  there is a squirrel-themed sweater growing in the back of my mind, but i am taking a much-needed break from warmer knits with something that reflects the change in the air.


it is the Bailiwick Pullover on the cover of the latest Interweave Knits (Spring 2014, project here on Ravelry). and, yes... i am making one in (gasp) pink (although, it is technically light salmon).  the stitches for the top-front section are done and waiting on a spare needle...


and i am about two inches in on the back section.


note the extra-wide, nearly-off-the-shoulder neckline.  i used TechKnitter's method for the tubular cast on.


despite owning a sizable collection of knitting tools, nothing beats a couple rubber bands for keeping stitches on a needle.


a hairpin makes a handy holder for a small number of stitches, and another rubber band holds it all together.  


the yarn is a 70% cotton/30% acrylic blend from the stash, which i am using doubled to get the right gauge.  it has a slight nubbly finish that adds to the overall texture.


i am making pretty decent progress thus far, despite taking a three-day break to rest my sore wrists.  hopefully it will be done before it gets too warm... so, i can pretty much take my time.  oh, Canada!


3.30.2014

the end (of winter) is nigh....

after ripping back the sleeves about a hundred times, i am pleased to announce that i have finally completed the lace cardi that i started more than a year ago for my mom (project here on Ravelry, original blog post from nearly a year ago... hold on while i hang my head in shame).


in the rush to get to the post office, i literally grabbed a few quick snaps in between getting dressed, so there are no pretty finished object photos on this one.  there is a glaring error in my stitch work, which i did not notice until just now.  luckily, i happen to be a Ross-tafarian, so i choose to see it as a happy accident.  [there is a joke in there somewhere... trust me].


given the ornate lace of this garment, i opted to go with three simple wooden buttons on the front.


i would love to say that i went for the quickest shipping option, but as the postage cost more than all the yarn, it will be a few days before it arrives at mom's door back home in Brooklyn.  she better love it, or i am putting myself up for adult-adoption.  any takers?

______________________________________

[what follows is  a draft i put together a week ago, but never got around to posting. that first photo was taken one week ago.]


there i was, standing in the middle of the street, grasping my camera between icy hands, with a smug voice behind me repeating, "it's the third day of spring".  indeed.


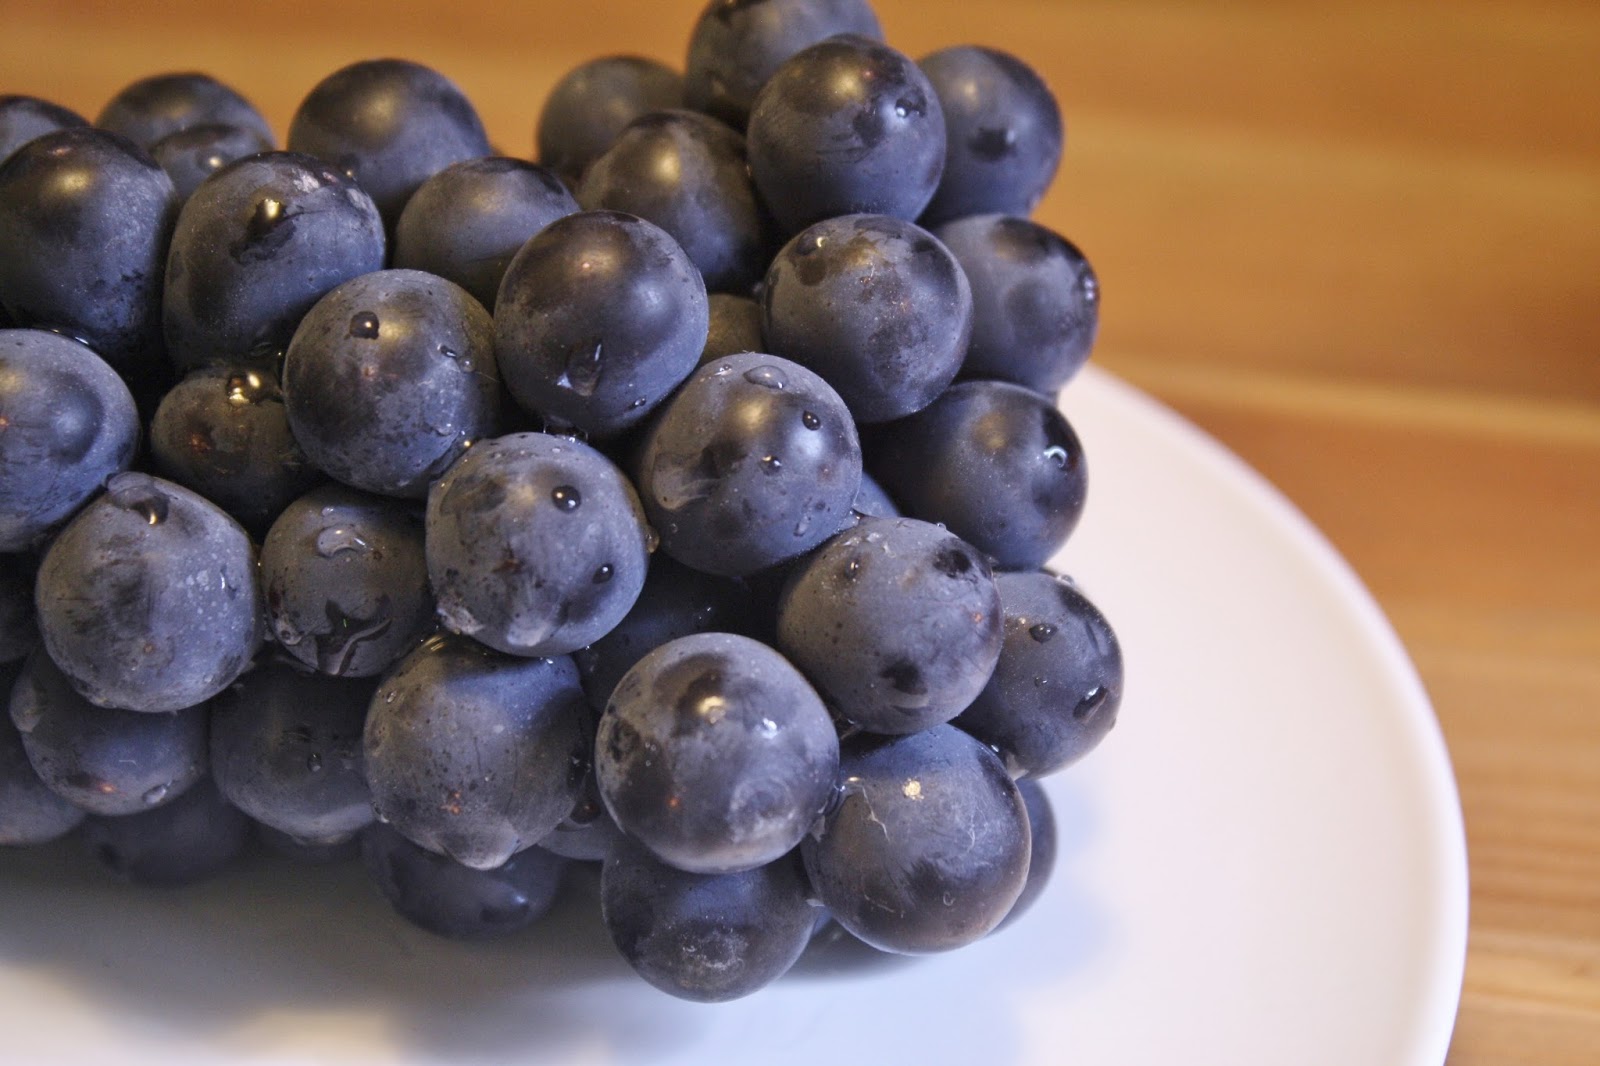
in my ongoing crusade to eradicate the eternal gloom of winter the third day of spring, i want to share a story that began last summer, with a bunch of concord grapes...


but, not just a bunch... like, many many many bunches of concord grapes.  to merely suggest that i have an appreciation for this particular fruit would be one of the greatest understatements on record.  i go near-crazy for a few weeks every summer, gorging myself on what is possibly the most flavorful table grape on the planet.  [that i have a mild allergic reaction to the grape skins, resulting in temporary itchiness around my lips and mouth is merely seen as a minor inconvenience].  there, in the midst of one such feeding frenzy, it dawned on me... grape juice and its chief derivative, red wine, produce some of the most notorious stains known to mankind.  why not harness that awesome power for something good???  

so, i did a bit of research (in between multiple runs to the market to restock the key ingredient), and it turned out that this was precisely the type of project i would enjoy.  i get to eat all the tasty grapes i could find, and the skins can be collected and re-purposed as one of Nature's most potent pigments.  not wanting to encourage a business of flies (yay for collective nouns!!!), i stashed my treasure in the freezer... and proceeded to totally forget all about it... until one recent, very cold day.  

i collected somewhere in the neighborhood of six cups of grape skins (with a few stems from those days when i was feeling lazy).  rather than forming one frozen block, as i had anticipated, they behaved like a large bowl of cornflakes and even made an interesting noise when i shook the bowl.  the skins were dumped into a large saucepan and boiled for as long as my patience would allow (which was roughly two hours, thought i was seriously tempted to call it done after fifteen minutes).


by this time, the liquid was as dark as wine.  a quick strain trough a few layers of muslin or a large scrap of fabric (i used part of an old t-shirt or something along those lines) was sufficient to remove all the particles that might otherwise get trapped in the yarn.  [this was seriously the best photo i managed to get with a boiling hot cup of liquid in one hand.  trust me... i am sufficiently ashamed.]


on the fiber front, i opted for two identical hanks of yarn and pre-soaked them in water with a few drops of baby shampoo...


then i took the experimentation one step further.  one was left to soak (note the bit of gold yarn tied to that hank for easy identification)...


while the other one was removed to the dye pot and mordanted in a solution of alum (aluminium sulfate, to be precise).


a mordant enhances the bonding of the pigment to the fiber and (sometimes) alters the resulting color.  a mordant can be relatively safe (e.g., vinegar) or potentially dangerous (e.g., quicklime).  i do not use dyes or mordants that i would not feel safe pouring down the kitchen drain, which is why i usually stick to vinegar or citric acid as my mordant of choice.

of course, there are situations where the perfect mordant-dye combo requires nothing more than a trip to the grocery store.  case and point:

  • chop up all the bits that are left over after eating a few pomegranates and dump them into a pot of water...

  • boil it to death and strain the liquid...

  • stir in some ground turmeric...


  • and, finally,  toss in some yarn.  [i spun this up from either Bluefaced Leicester or Corriedale wool, and it has been sitting undyed in a bin of other sheepy goods for a few years now.]  

  • the pomegranate produces a light-yellow color on its own, but it acts as both a mordant and a brightener when combined with the turmeric.  ever wonder why curry leaves such a powerful stain?   turmeric!!!


but i am wandering from the point of this tale.


so... the two hanks of yarn, were placed together into the grape-skin solution...


and heated (not boiled) for about 30 minutes.  there is very little discernible difference between the two yarns at this point.


out of the dye pot, and oxidation quickly sets in.


at this point, the unmordented yarn was returned to the dyepot, along with a few teaspoons of citric acid.  notice the difference now?


the one on the right was pre-treated with alum, while the one on the left was post-treated with citric acid.  despite being dyed together, the choice of mordant had a profound effect on the outcome.  notably, the citric acid restored the rosy color that was present before oxidation set in.  not bad for a pile of grape skins.


3.05.2014

hot chocolate and happiness...

it is March, and phrases like minus-twenty and  snow accumulation are being bandied about in polite (or, even, impolite) conversation, so i must still be in Canada.  as i walked from the kitchen, a cup of tea in one hand and a glass vase in the other, i caught a glimpse out the window and my spirit sank just a tiny bit.  don't get me wrong... snow is lovely... every once in a while.  however, this daily reminder that we are still in the depths of winter is starting to take a toll on the collective sanity.

i've resorted, in recent days, to taking drastic actions to chase away the winter blues.  the first step was to replace the blues (and greys, for that matter) with a slightly more cheery color.

i walked into the local flower shop, and my attention was immediately arrested by the so-very-not-seasonal shock of yellow lurking just inside the walk-in cooler.  apologies to the rosesorchids, and other more pedigreed offerings, but this situation required much stronger medicine!


daisies and (their close relatives black-eyed-Susans and echinacea) always remind me of the many summers i spent working at the Botanic Garden.  to my way of thinking, the asteracea family of plants are the very definition of sunshine and warmer days.  the word is derived from the Greek aster, which means star (which includes the brightly-glowing ball at the center of our humble galaxy), and this family of flowers are renowned for the habit of opening and closing with the rising and setting of said orb.  if ever there was an official ambassador of summertime, this is it!


while at the flower shop, i also picked up a trio of miniature elephants, two soapstone and one wooden, which are presently residing in a shadow box on my bedroom wall (is it still a shadow box if it has no glass covering???).


i also finally got around to adding some more cans to my craft corner!!!  this is a pretty neat way to recycle kitchen refuse into storage for anything from yarn (seriously... what else would you expect me to suggest first???) to random art supplies.


full disclosure: i originally stumbled upon this genius project while searching for yarn storage ideas on the interwebs about a year or two ago.  i got the idea from Lee Meredith's blog, and she, in turn, got it from some magazine.  Lee used a combination of cardboard strips, tape, and contact cement to hold the cans together and screws/nails to secure them to the wall.  having personally engaged in near-acrobatic feats to paint our high-ceilinged living/dining room, nails and screws were not an option, so i had to improvise.

the major concern is to make sure that the chosen method will support the weight of the cans and their contents. there was a bit of trial-and-error involved (cans falling in the middle of the night, for example), but i've had nine of them on the wall for several months now without incident, so this method is secure enough for my needs.

here is the rather messy step-by-step process (the number of actual steps being determined by how overly-complicated you prefer to get when tackling the simplest tasks).  look away if you have an aversion to hot-glue abuse.

materials:


step one:  drink a lot of coffee or hot chocolate.

step two: repeat step one until you have enough cans to get started.  i set mine up in strips of three cans each, so i can easily add more strips (in any direction) when multiples of three cans become available.  rinse and dry the cans.


step three: cut a strip of contact paper wide enough to completely cover the outside of each can and carefully apply it to said surface (this part is good times for those of us inclined to OCD).  try to overlap the ends slightly, but if your paper is a tad too short to go around the whole can, you can hide the small gap by turning that side toward another can during the assembly process.


step four:  turn the cans upside down.  the center of the can will likely be lower than the bottom rim.  a small piece of cardboard, or something of a similar height, can be used to make the center of the can even with the rim.  i saved paint stirrers from the hardware store, as they are the perfect thickness for this job.  using the utility knife, score the sticks at (roughly) one-inch intervals and snap off one piece for each can.  don't worry about jagged edges.

apply a dollop of hot glue to the center of the can and secure the piece of wood.  don't skimp on the hot glue, or the can may easily snap off at some later point.  i usually apply a bead of glue around the edges, like caulking, just to make sure it is well and truly secured.  repeat for all the cans.


step five: now it is time to "string" the cans together, according to your planned configuration.  in this case, i am connecting three cans at a time onto one piece of the backing material.  my backing material is a piece of particleboard (masonite, i believe it is called, but do not quote me on that) from the back of an old bookcase.  i scored the board using the utility knife and snapped it into sections roughly two inches wide and long enough to reach across all of the pieces of wood glued to the bottom of the three cans. line the cans up as desired (this is your chance to hide messy seams, if necessary), apply a healthy dollop of hot glue on top of each of the wooden pieces, and place your strip over the hot glue to connect the cans together.


step fivepointfive: this is a step that grew out of the trial-and-error phase when i first attempted this project.  note that the particleboard has one smooth, finished side (black) and one rough, unfinished side (brown).  to minimize the visibility of the particleboard once the cans are mounted on the wall, i glued the strip with the darker side facing down (so that it becomes part of the shadowy space between the cans).  however, this means that the adhesive tabs will go on the porous, unfinished side, which is probably why the cans fell about an hour after the first time i put them on the wall.


in order to create a smooth surface on which to attach the adhesive tab, i cut up a few of the plastic lids from the cans and hot glued them where the adhesive tabs would be placed.


step six: place a small dollop of hot glue wherever the top and bottom rims of the cans touch, which will give it a bit more stability when mounted.  [also, when adding new strips to the wall, i use a dollop of hot glue to connect the edges to the cans already in place.  it may seem like overkill, but it reduces wobbling of individual cans and the likelihood of snapping one off with regular use... just trust me on this point.  trial-and-error, remember?!?!]

step seven: attach the adhesive tabs (on top of the bits of plastic, if  you used them).  keep the outer pieces of paper in place until you are ready to install the cans on the wall.


it may be a bit messy, but the front view is all that matters.


step eight: now... find a wall, remove the paper backing from the adhesive tabs, and mount the cans!!!  stick your hand into each can and press firmly against the wall to ensure maximum stickfulness.


word of advice: assume that the cans will fall and take appropriate steps to make sure nothing gets broken.  if you wake up the next day and they are still in place, then you can consider them safe for use.  keep in mind that these cans are defying gravity using only a few double-sided adhesive tabs, so this may not be the wisest place to store anything heavy or fragile.  you can stick to same-sized cans and a single pattern of contact paper, or mix things up for variety.  my favorite animator brought home a couple large, empty coffee containers from the studio, so they have also been pressed into service.  i also used a combination of patterns for covering the cans.  this was a challenge to my extreme need for evenness, but i am coping for now, although there is always the possibility of a late-night emergency can recovering episode in my near future.  

this was a rather convoluted process, but it worked, and that is all that matters in the end.  i will likely revisit this project at a later date. if any of the surfaces in this ancient building were relatively even, i would have stopped after step four, then added the adhesive tabs and mounted the cans directly onto the wall.  alternatively, it would have been interesting to use one large piece of backing material, paint it white, and use the rim of the cans to stamp a series of  colored rings onto the surface, which can later be "filled in" by mounting a can in that space.  the possibilities really are endless, and the result can be both fashionable and functional.

this does not even begin to scratch the surface of my yarn storage problem, but it does make for an interesting focal point on the empty wall above my desk, where i can show off some of my hand-dyed and hand-spun fibers or just stare at them and dream of making beautiful things.

1.29.2014

(dis)comfort zone...

as a dyeing enthusiast with some (debatable) aptitude for the craft, it would be easily assumed that i have a fondness for color.  to the contrary, i tend to live life in greyscale, so it took a great deal of willpower to finally go ahead and dye some yarn for my next planned adventure.  there i was, yesterday evening, preparing multiple small batches to achieve the necessary palette for a pair of scarves inspired by one small bird... more on that at some later date.

luckily, it's arid enough indoors that they were all dry by the time i got out of bed.  i draped the hanks across a south-facing window and spent most of today staring at them with equal parts awe and fright.  grant it, some of the yarn is black, but the rest of it is not.  this is so far outside my comfort zone, i'm not sure how i will cope.


don't let the sunshine fool you... it is well below freezing outside.  this winter glow is just a clever trick to lure unsuspecting travelers to their doom.

the yarn is some sport-weight, 100% superwash Merino wool leftover from the recent blanket for my friend's baby boy.  i used Dharma Acid Dyes in the following colors (from left to right):

- brilliant yellow with the tiniest hint of blazing orange
- equal parts blazing orange and brilliant yellow
- blazing orange with a splash of brilliant yellow
- peacock blue (2 hanks)
- true black (3 hanks)

it may not be obvious from these images, but this black is black, and a little bit goes a long way.


i also knitted up a small swatch (a sample, for the non-knitting world) for a toque for my favorite animator (because it is terribly embarrassing for him to be walking around with a Nike® hat, especially when you can't move in our place without tripping over a bag of yarn).  and, as if to prove what a total anachronism i am, i did the math to figure out how many stitches are needed for said headwear using an ancient device known as a five-function calculator (although, this one also has a % button, so it may technically qualify as a six-function model).  this was purchased for the grand sum of $5 US, back when i was teaching a summer course in Statistics and my fancy programmable calculator (the one they made us buy back in undergrad for all those Science labs) died on me while composing a lecture, so i purchased the first calculator i found... and it still works!


i'm not sure where these froggy pincushions came from, but there are a few of them floating around the apartment.  i need to tighten the "eyeballs" before they fall off and get lost, but that involves finding a needle and thread, and... well... that would be far too simple.


oh... and i stumbled upon this object on the bathroom floor.  judging from the size of the holes, i'm guessing the little grey kitty was involved.  poor pencil never knew what hit it.